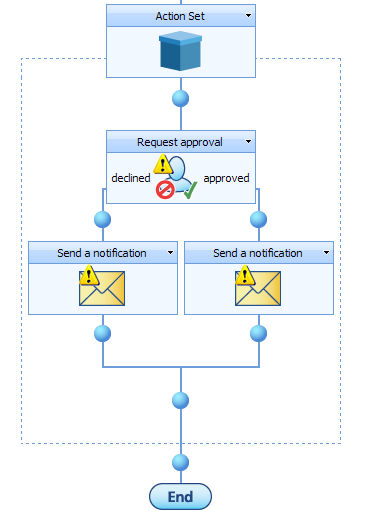
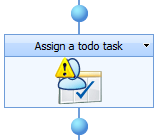
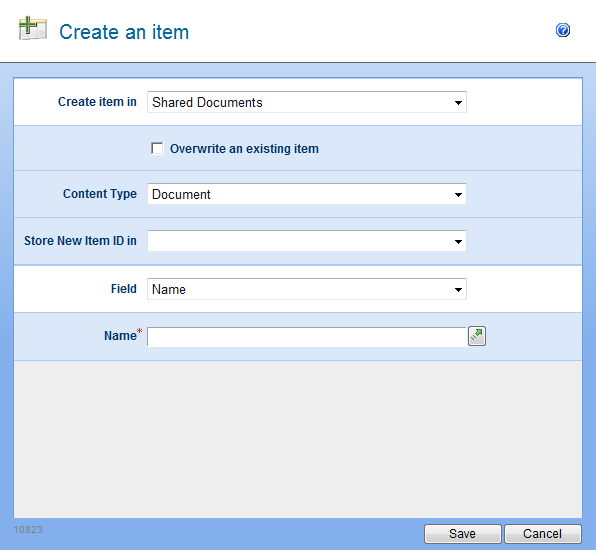
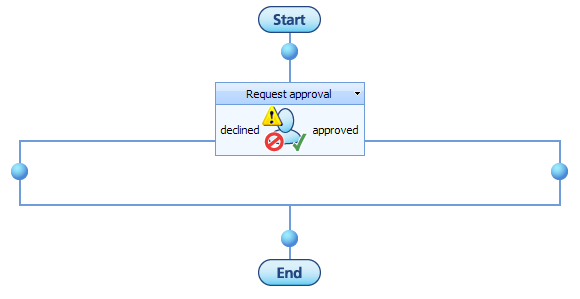
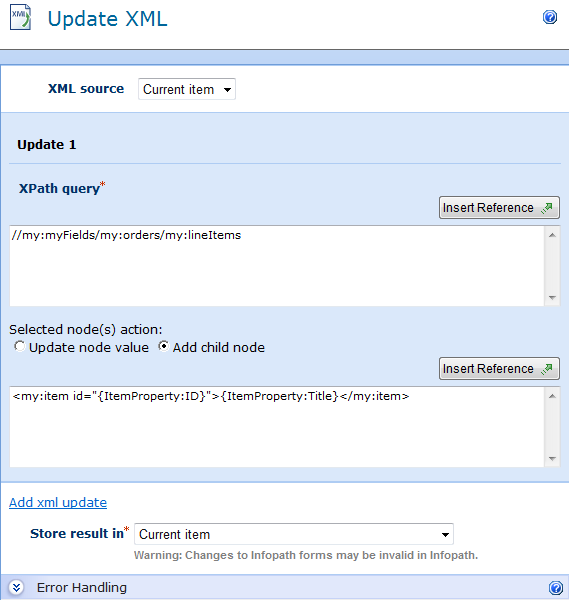
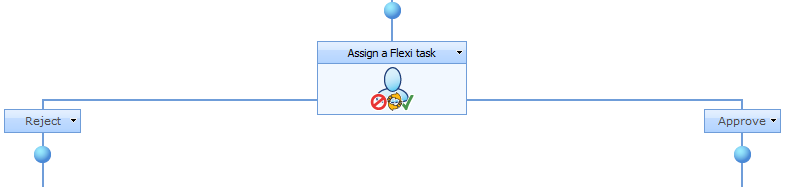
This action allows you to assign a task to one or more users and request a specific outcome. The list of possible outcomes is determined by the workflow designer. This action also encapsulates task reminders and escalation.
It also includes functionality provided by the 'Task reminder', 'Delegate workflow task', and
'Complete workflow task' actions.
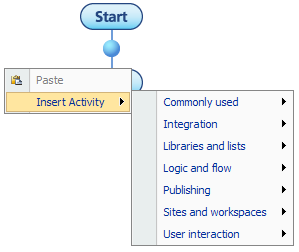
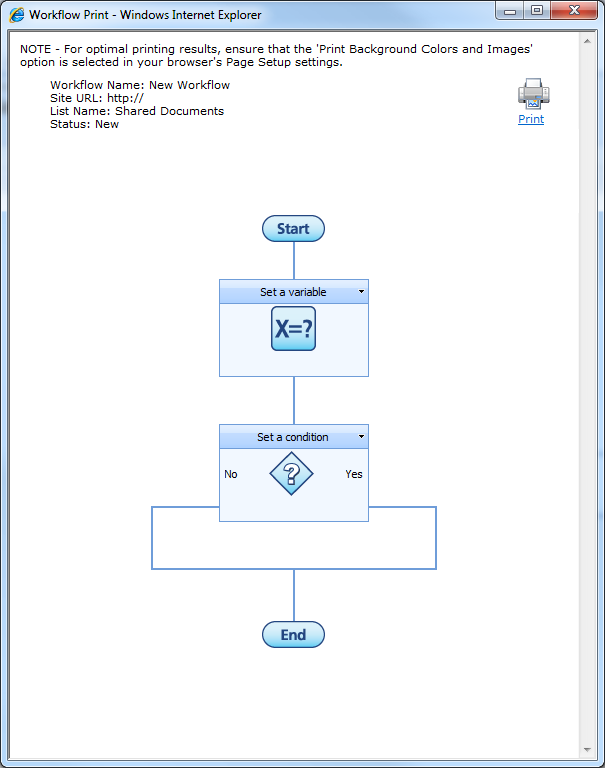
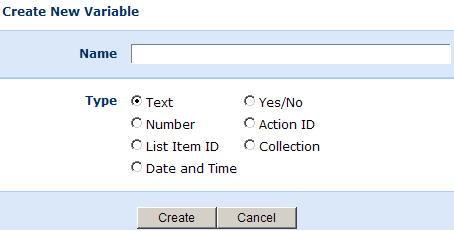
To use the workflow action, drag it from the Actions palette at the left of the page and drop it onto a blue "pearl" on the design canvas. Alternatively, you can right-click a pearl, mouse-over "Insert Action" and select the action from the "User Interaction" group within the list. You will need a string workflow variable to store the action outcome and a yes/no workflow variable to store whether or not an outcome was achieved.
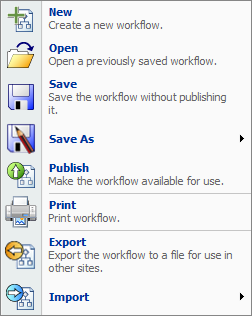
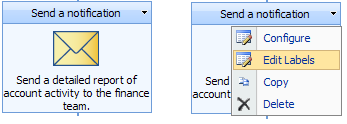
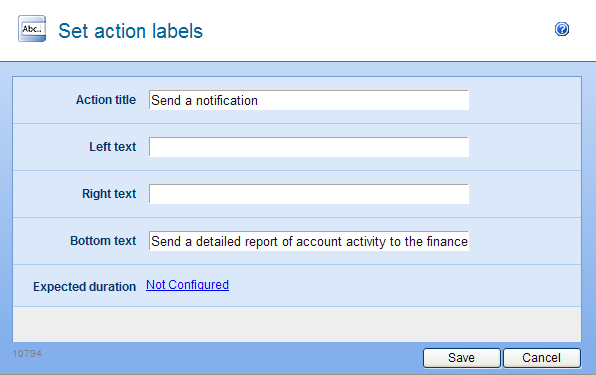
To change the settings used by the action, left click in the action's title bar to activate a drop-down then select "Configure" or double-click the action's icon. For more information on the other options in the drop-down, please refer to the Getting started with the Nintex Workflow designer help page.
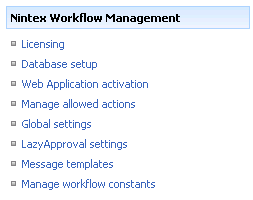
Options within this action
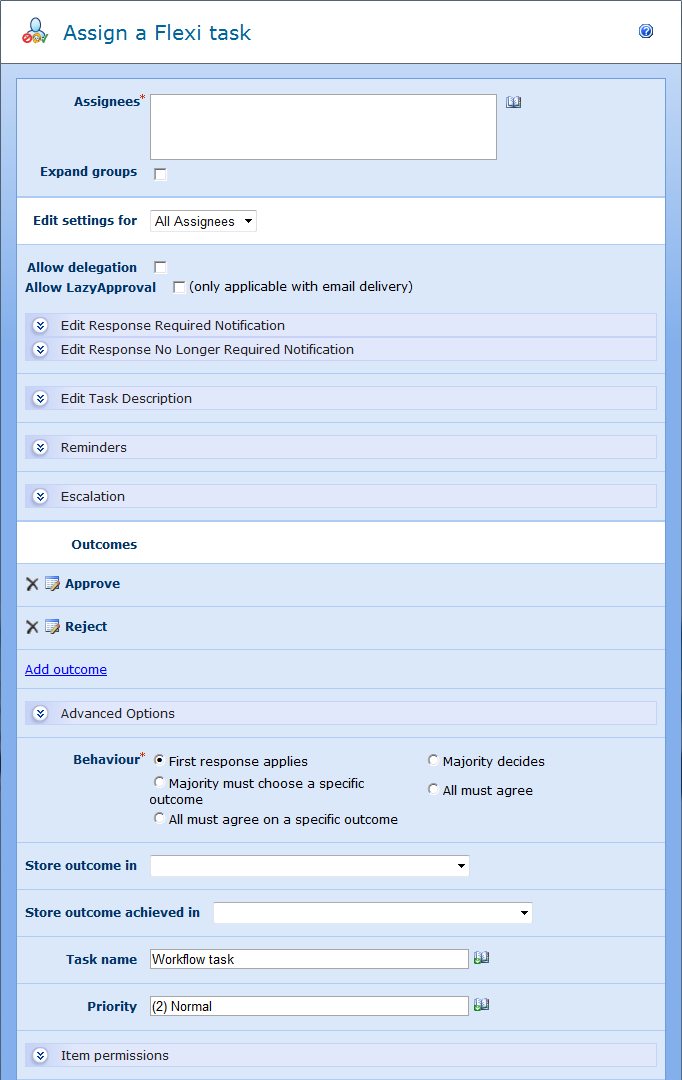
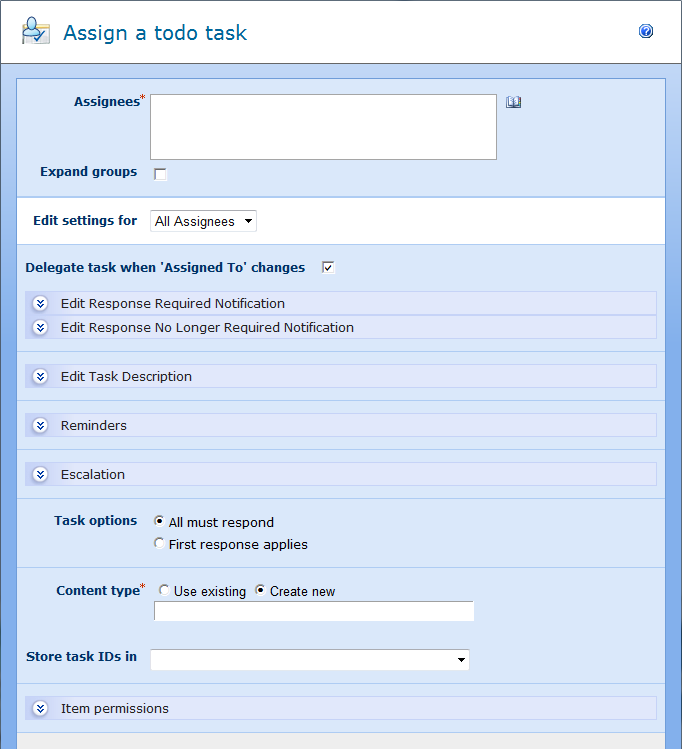
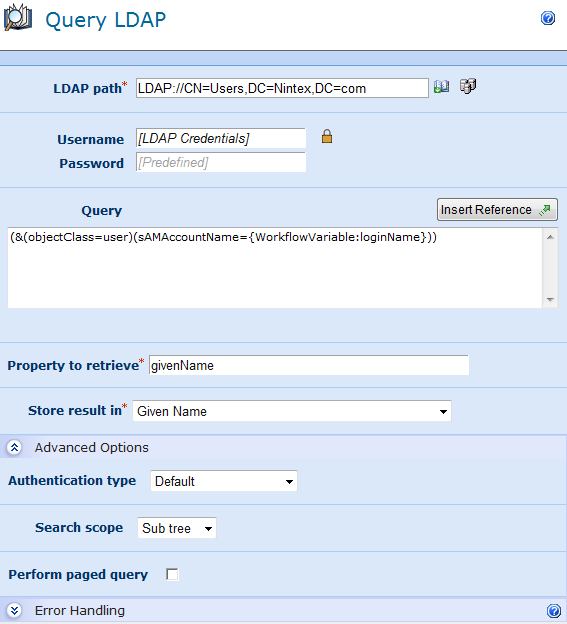
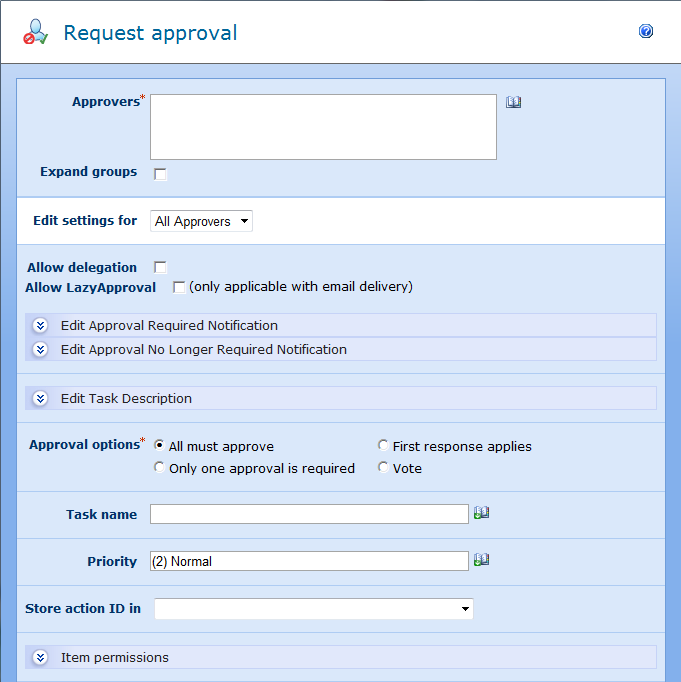
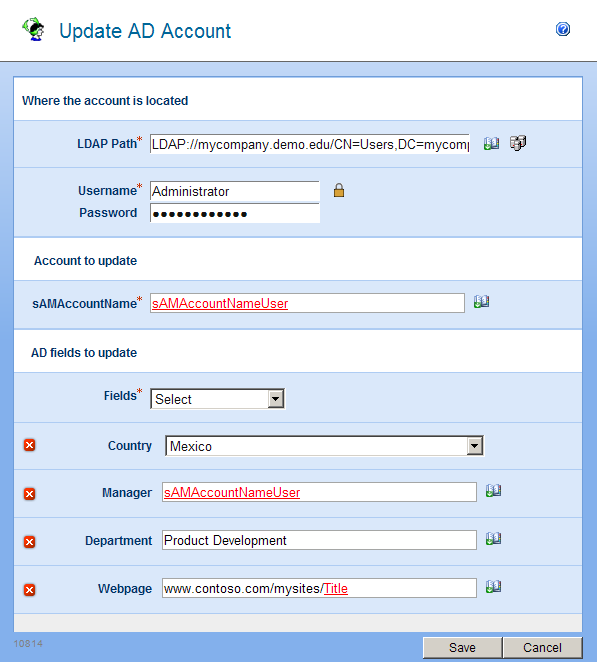
Assignees
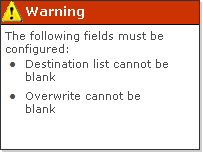
The assignees list is a mandatory field that contains all users or groups that will be assigned the task when the workflow runs.
Users can be entered directly using their username, email address or full name and will be resolved where possible against the SharePoint user list or Active Directory. Please note that users and groups that do not resolve automatically will require LazyApproval to complete their assigned task.
In the case when a group is assigned the task and Expand Groups is not selected, all users in that group will receive the task notification however, the first respondent will represent the entire group. If Expand Groups is selected, an individual task will be assigned to every member of the group.
Note: Groups will only be expanded to one level. Groups within groups will not be expanded.
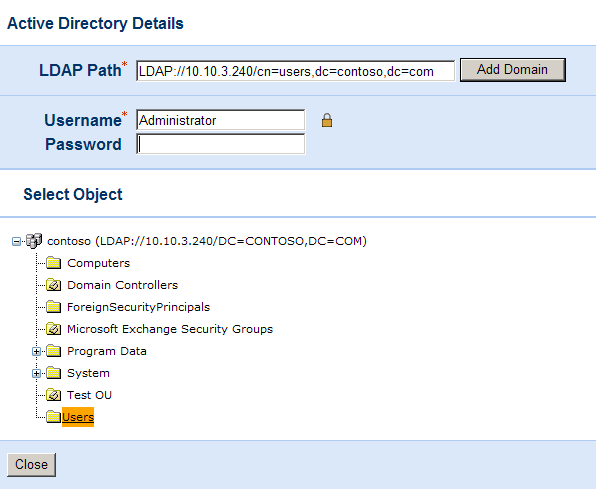
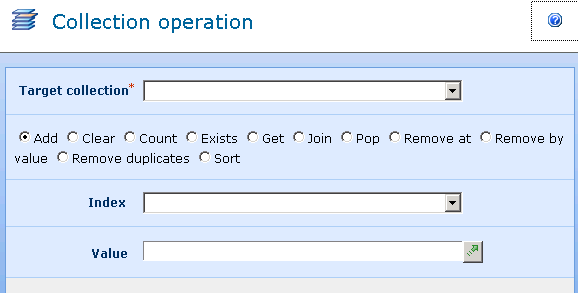
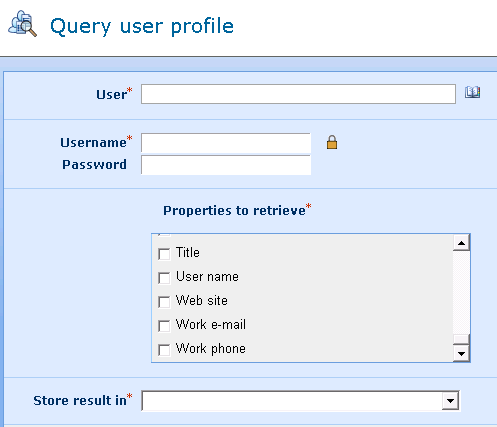
In order to search for users, click on the address book icon to the right.
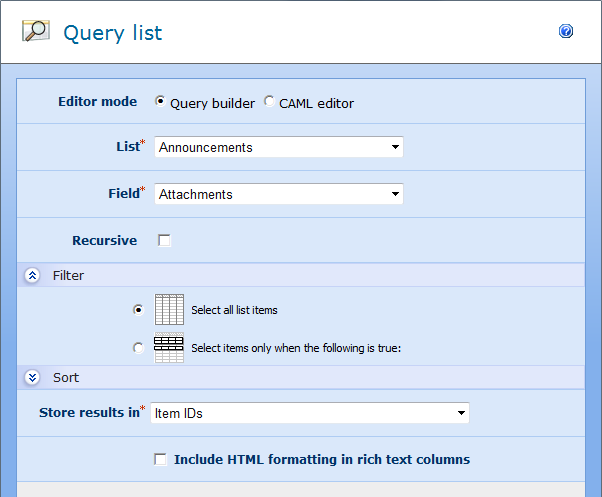
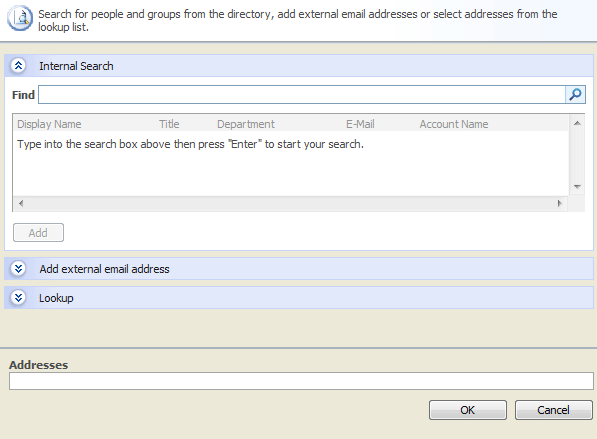
Select People and Groups
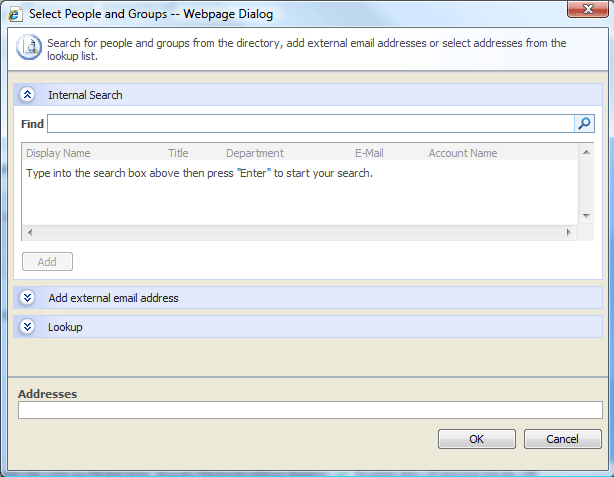
This configuration popup allows you to search and/or add users to the approvers list. Three tools are provided - click the title bar to expand or collapse each one. The three tools provided are:
- Internal Search: By entering a partial display name, email or user
account name and clicking on the magnifying glass the system will provide
you with a list of matching users and groups from SharePoint as well as
Active Directory.
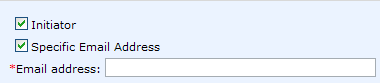
- Add External Email Address: Allows you to enter an external email
address manually. Where possible Nintex Workflow 2007 will resolve this to an actual
user account.
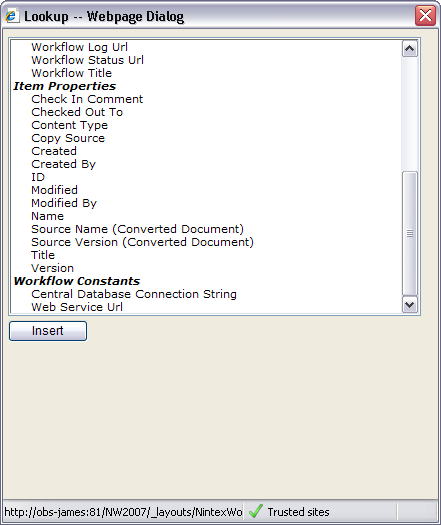
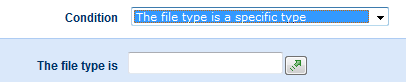
- Lookup: Allows you to add a dynamic reference as an approver. e.g. Workflow variable, list field.
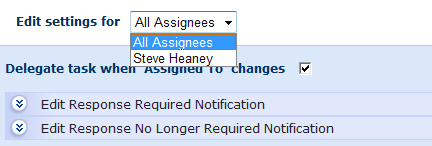
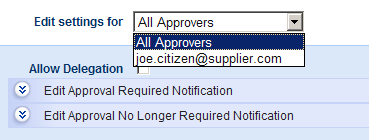
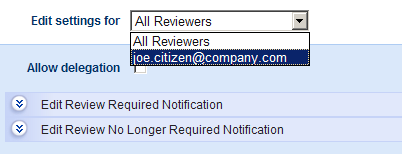
Edit settings for
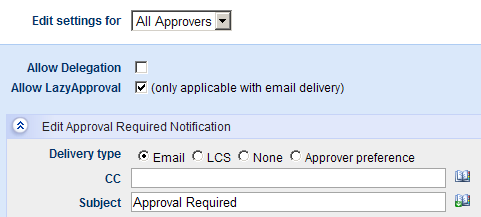
By changing this setting from the default "All Assignees", it allows you to configure unique notification options for each assignee in the list. Unless specifically configured, assignees will use the "All Assignees" settings. To override settings for a specific assignee, select their name from the drop down list.
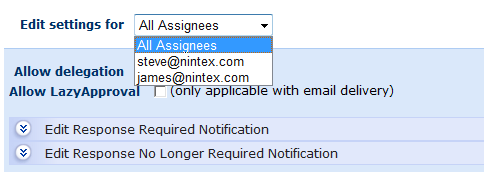
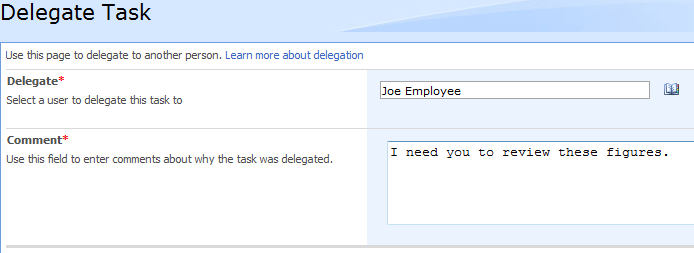
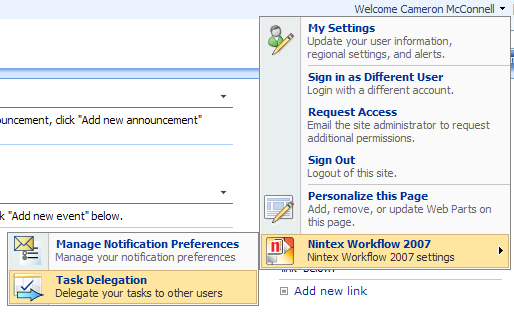
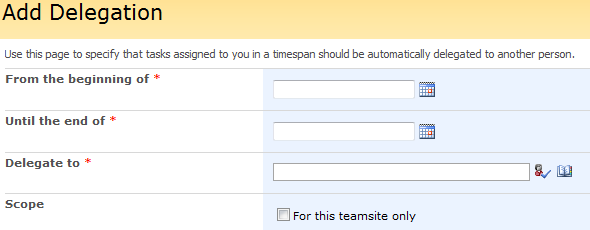
Allow Delegation
When this option is selected the assignee at runtime can delegate the task to another user. For more information, please refer to the Delegating Approval Tasks help page.
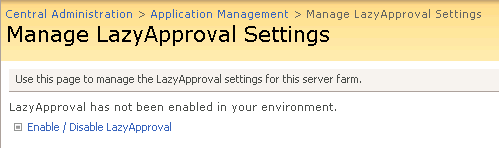
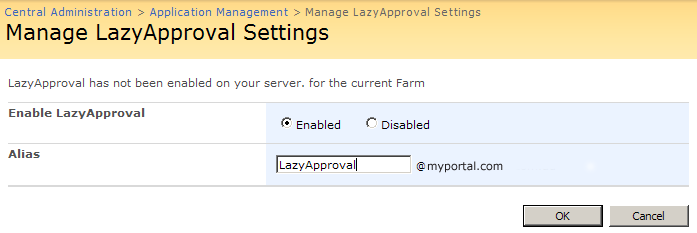
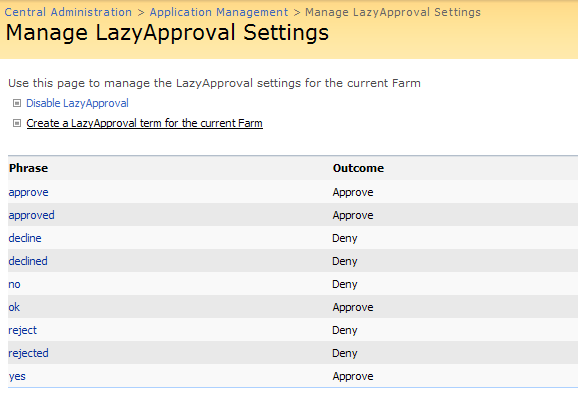
Allow Lazy Approval
If LazyApproval has been enabled for your server, you can permit the assignees to use Lazy Approval. LazyApproval allows users to respond to tasks via email by replying to the task notification message with their chosen outcome.
Notification Settings
There are two different notifications to configure
- Response Required: Sent when the task is assigned to a user. This is also used when the task is delegated by one user to another.
- Response No Longer Required: Sent when the user no longer needs to respond to the task. This can occur when a task is assigned to multiple users but only one is required to respond, when the workflow is terminated prior to the task being processed, or when an error occurs in the workflow.
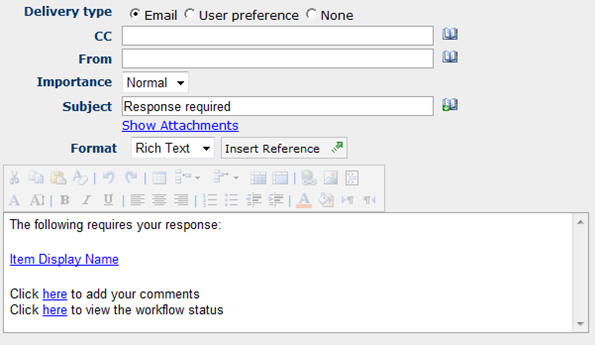
Delivery Type
Delivery type is the method of delivering the notification to the primary and if included, auxiliary user(s).
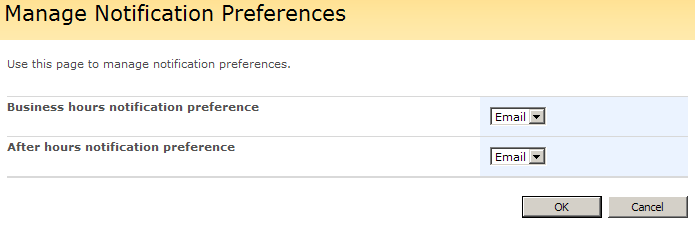
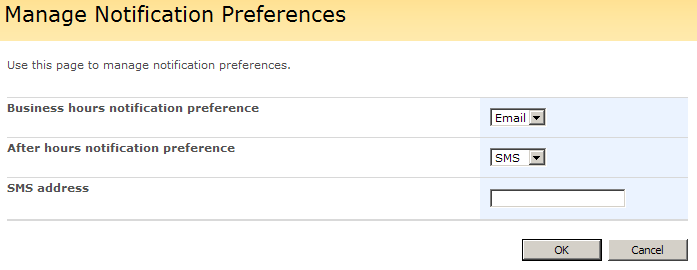
You can choose between None, Email, Instant Message or "User preference". For information on
"User preference", please refer to the User Preferences Help Page.
CC
The CC field sets auxiliary user(s) who will receive the notification.
To set the auxiliary user(s) click on  to open the Select People and Groups popup.
From
The From field, if specified, overrides the default sender of the notification. By default the sender is configured to use the setting configured in Global Settings.
Importance
The priority of the notification. This is only applicable when using email notifications.
Subject
The Subject is the title of the notification being sent and is a mandatory field. If an LCS/OCS message is being sent it will be pre-pended to the body of the notification.
You can either type the Subject of the notification manually or by clicking on ,
you are able to
insert references from within the runtime instance of the workflow.
Show Attachments
Allows file attachments to be added to the notification. Please note: Files will not be received by a user when SMS or IM is selected as the delivery method.
Format
This sets the format of the email. If Rich Text is selected you will be able to italicize, bold, underline and indent information within your email using simple HTML styles provided by the SharePoint rich text tool bar. Plain Text is simply the text without any stylized formatting.
Notification Body
The body of the notification will adapt depending on whether the Plain Text
or Rich Text format is selected. Within the space provided you can enter the
content for the notification as straight text and
references from with the
workflow.
Edit Task Description
Allows entry of dynamic text that will display on the task response form. This can be used to communicate additional information about the task to the responding user.
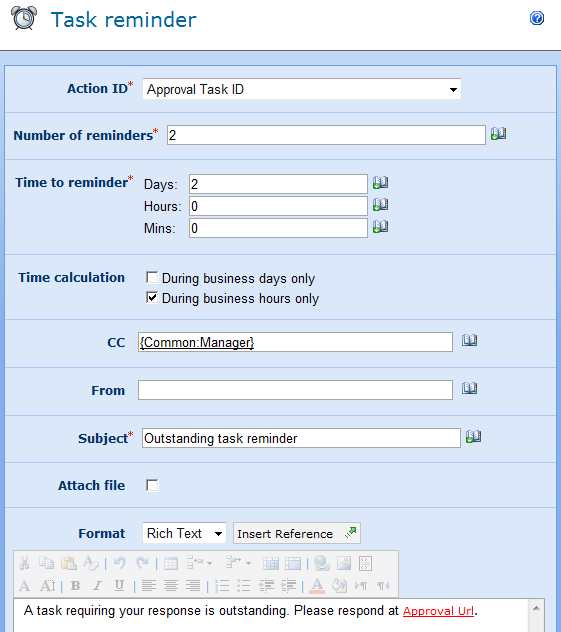
Reminders
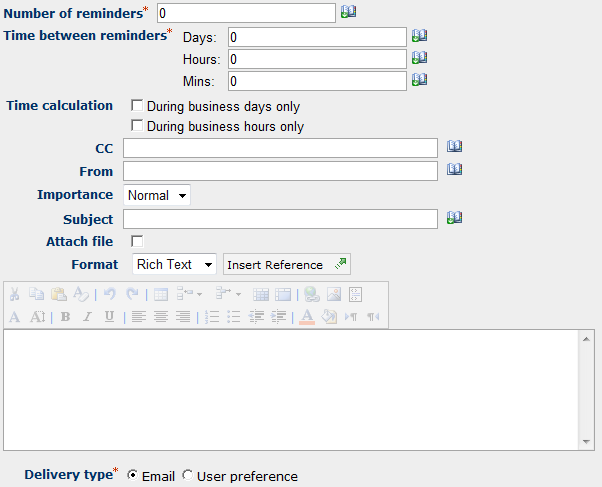
Optionally, you can configure a notification reminder to be sent to each assignee who has not yet completed the task. As well as customising the notification, you can also configure the following reminder settings:
Number of reminders
The number of reminders to send.
Time between reminders
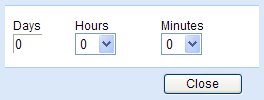
The delay before sending each reminder in days, hours and minutes. Note: The total time is calculated by summing all fields, regardless of the Time Calculation option selected. For example, 4 days and 4 minutes will be calculated as 96 (24x4) hours and 4 minutes.
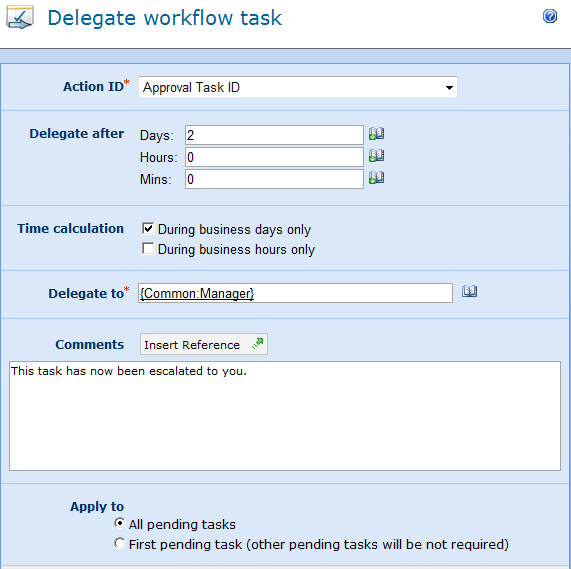
Time calculation
Specifies whether or not hours outside the work week should be included when counting down to send a reminder. The 'During business days only' option will specify that weekends or holidays are not included in the count down, but after hours on a business day are. The 'During business hours only' option specifies that only business hours are used in the count down. If neither option is selected, all hours will be included in the count down. The following two examples will further explain the behaviour of each option:
Example 1: The task is assigned Friday morning and is configured to wait 1 day before sending a reminder. The work week is defined as Monday to Friday.
Example 2: The task is assigned Wednesday at 4pm and is configured to wait 4 hours before sending a reminder. The work day is defined as Monday to Friday, 8am to 5pm.
During business days only
Example 1 will send a reminder Monday morning because weekends are not included in the count down.
Example 2 will send a reminder at 9pm on Wednesday because after business hours are included in the count down.
During business hours only
Example 1 will send a reminder Monday morning because weekends are not included in the count down.
Example 2 will send a reminder at 11am on Thursday because after business hours are not included in the count down.
Neither option
Example 1 will send a reminder Saturday morning because weekends are included in the count down.
Example 2 will send a reminder at 9pm on Wednesday because after business hours are included in the count down.
Escalation
Optionally, you can configure escalation. There are two possible escalation paths.
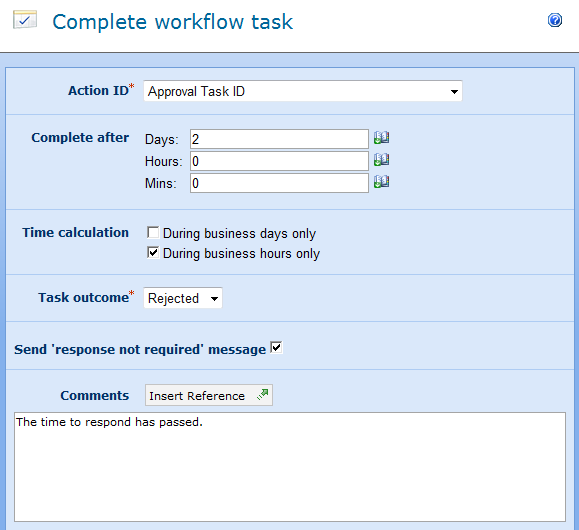
'Delegate task' and 'Complete task'. Escalation occurs after all reminders have been sent and the specified "Time to escalation" has elapsed.
'Delegate task' will re-assign all pending tasks to the nominated user after the specified time.
'Complete task' will auto-respond to all pending tasks and set the overall outcome of the action to the indicated outcome after the specified time. The specified outcome does not have to be one of the configured possible outcomes.
Behaviour
There are five behavioural alternatives to instruct Nintex Workflow how to handle tasks with multiple assignees. These are:
- First response applies: The first response received will be used for the overall outcome. All other pending tasks will be set to "not required".
- Majority must choose a specific outcome: The majority of assignees must agree on the same outcome. If a majority is not reached, the "outcome achieved" variable will be set to "no" and the overall task outcome will be blank. As soon as Nintex Workflow determines that a majority cannot be reached, the action will complete and all pending tasks will be set to "not required".
- All must agree on a specific outcome: All assignees must select the outcome specified in the "Outcome" drop down list. If any assignee chooses an alternative outcome, all pending tasks will be set to "not required", the "outcome achieved" variable will be set to "no" and the overall task outcome will be blank.
- Majority decides: The Outcome variable will be set to the most popular outcome. If Nintex Workflow can determine the most popular outcome before all assignees have completed the task, all pending tasks will be set to "not required". If two or more outcomes have the same number of responses after all tasks are completed, the "outcome achieved" variable will be set to "no" and the overall outcome will be blank.
- All must agree: All assignees must agree on the same outcome. If an assignee responds with an outcome which differs to a previous respondent, all pending tasks will be set to "not required", the outcome achieved variable will be set to "no" and the overall task outcome will be blank.
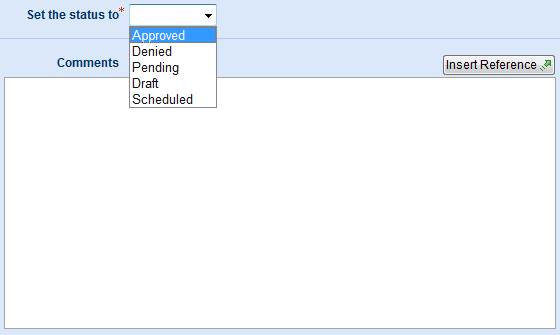
Outcomes
The outcomes define all the possible responses to the task. When completing the task, assignees must choose from one of the listed outcomes. You can add new outcomes by clicking "Add outcome" or remove/edit existing outcomes using the icons. Each outcome is configured with a name and an optional description. The description is displayed on the task response form and can be used to provide instructions and more detail. Whether or not the assignee must provide comments for the outcome can be configured as optional, required or none.
Advanced Options

Do not create branches
When this option is selected, the workflow canvas will not show branches under the Flexi task action. Branching logic can then be implemented manually.
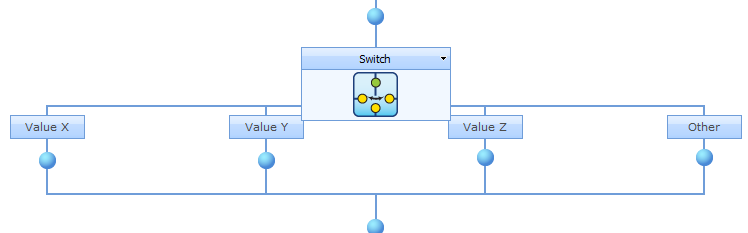
Include an 'Other' branch
When this option is selected, an additional branch will be rendered to capture any outcome that is not explicitly defined in the 'Outcomes' panel. The other branch can be used to capture the case when no outcome is achieved or a custom outcome is used with the 'complete task' escalation option. This option is only available when the 'Do not create branches' option is not selected.
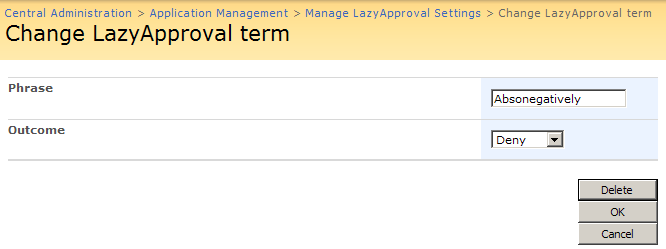
Do not use LazyApproval terms
When this option is selected, LazyApproval responses must be an exact match to an outcome name specified in this Flexi task action. When this option is not selected, any outcome name that is recognized as an 'approve' or 'reject' term as defined in the LazyApproval settings can be responded to with any other 'approve' or 'reject' term.
Store outcome in
After an outcome is reached, this workflow variable will be populated with the chosen outcome. See the Behaviour section for more detail on how the outcome is determined.
Store outcome achieved in
In some circumstances, it is possible that an outcome is not reached. After this action is completed, this workflow variable will be populated to indicate whether or not an outcome has been reached. See the Behaviour section for more details.
Task Name
Allows the title of the task to be defined. This is the title that appears in a SharePoint task list. If left blank, the action title will be used by default.
Task content type
Allows a task content type other than the default to be used. This option will only display if an alternative content type is available on the site. Alternative content types are primarily used to enable custom task response forms.
Priority
Specifies the value that should be assigned to the priority flag for the task.
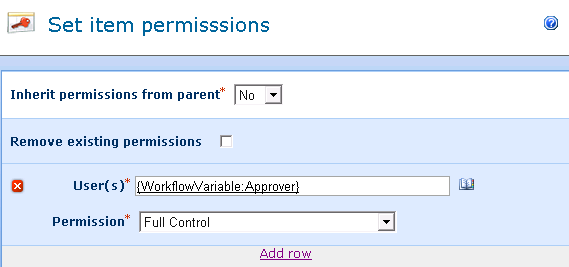
Item Permissions
Set user permissions to: Sets the user permission on the item.
When task is complete, set user permissions to: Sets the user permission on the item after the task has been completed.
Note: Setting the item permissions could be useful when the task is delegated, this will give the delegated user the necessary permissions to view the item.