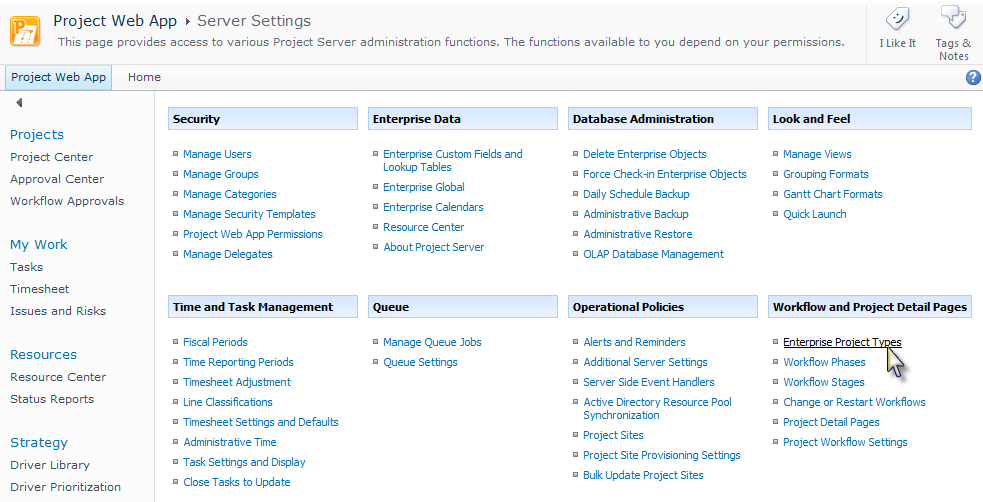
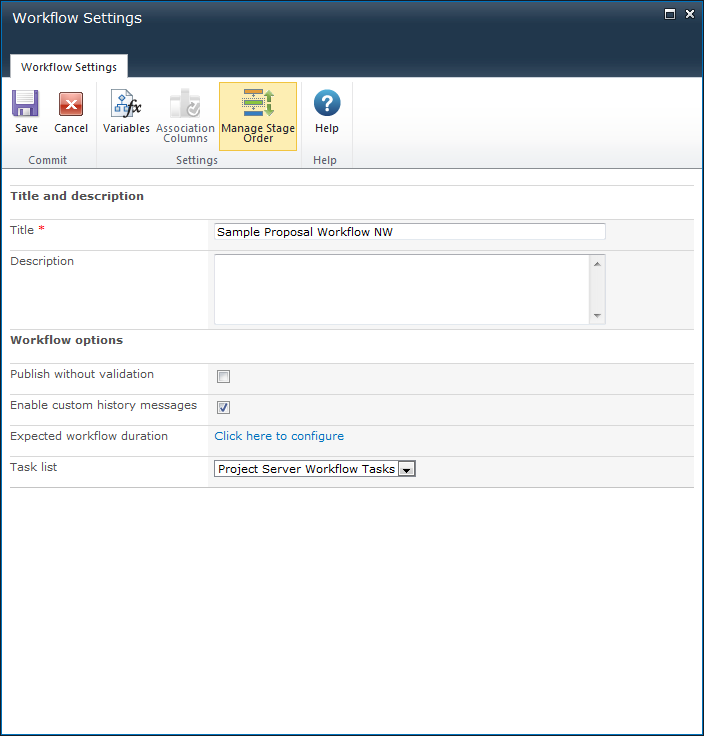
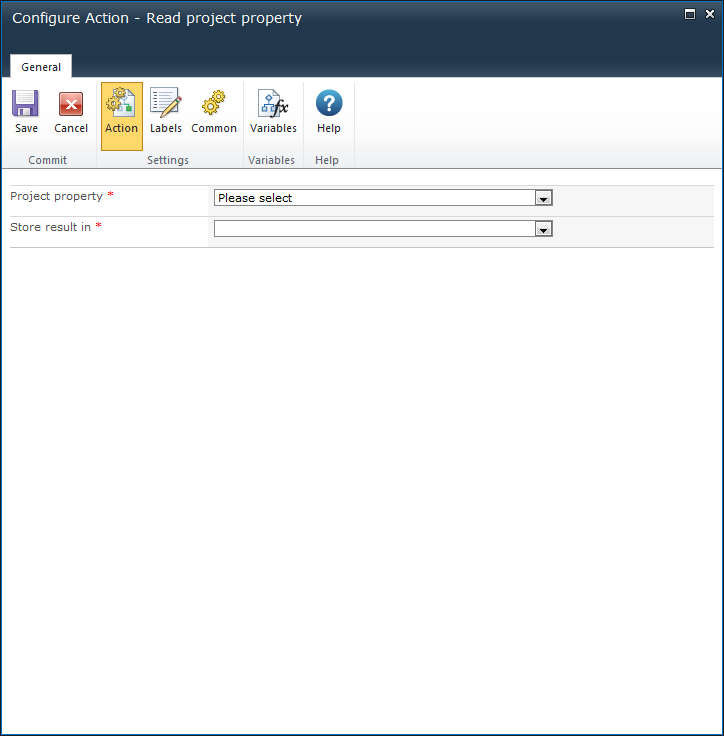
Project Web Application activation
Web Application activation is a step in the installation process which allows 'Nintex Workflow 2010' and 'Nintex Workflow for Project Server 2010' to operate with 'Project Server 2010'. The activating process will activate the necessary features to enable 'Nintex Workflow 2010' and 'Nintex Workflow for Project Server 2010' on the PWA sites and also register the Nintex Workflow code in the web application web.config file as authorized to run in a workflow.
Deactivating a site will deactivate the Nintex Workflow for Project Server 2010 feature, removing the UI elements from the site.
Note: If Nintex Workflow 2010 configuration database in the Database settings page is modified, the PWA site will need to be re-activated.
Manage Server Account
Activating the Manage Service Account provides the account running the ‘Microsoft Project Server Queue Service 2010’ access to the Nintex Workflow 2010 database. When workflows are running within this process (a part of normal operation) they will connect to the Nintex Workflow 2010 database with this account.
To find the Service Account:
- In Central Administration, click on Application Management.
- In the Service Applications section, click on Manage service applications.
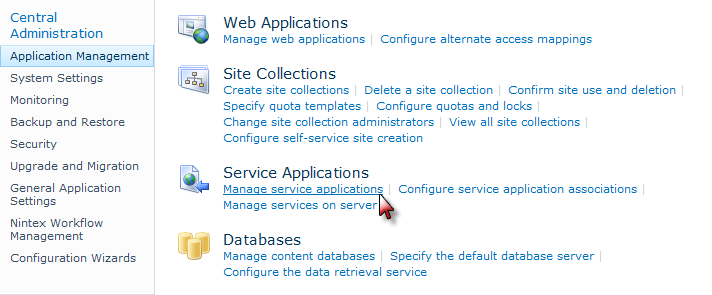
- Select the Project Server Service Application, and in the Ribbon click on Properties.
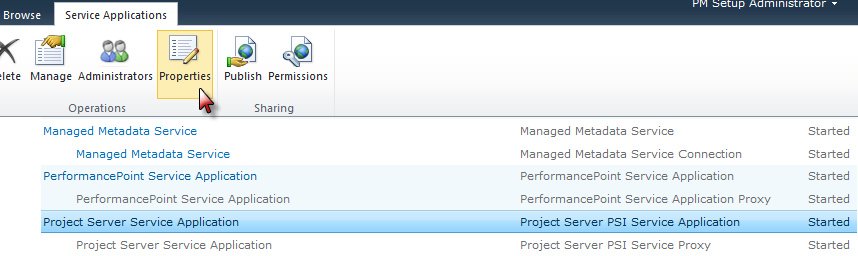
- In the Application Pool Settings section, take note of the Application Pool name (i.e. SharePoint Web Service Default) that the Project Server Service Application is running on.
- Return to Central Administration, click on Security.
- In the General Security section, click on Configure service accounts.
- Select the Application Pool name from the drop-down as noted in the step above.
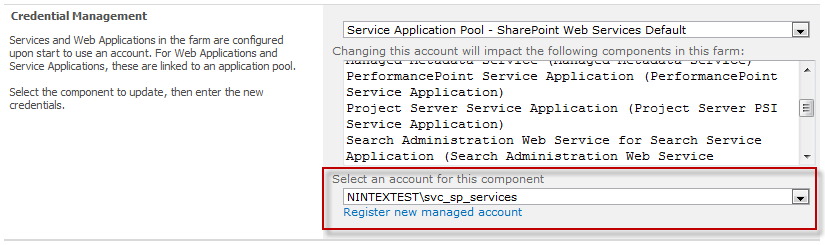
- Take note of the domain account configured for this application pool. This is the identity that needs to be granted access to when activating Nintex Workflow for Project Server 2010.
Note: If the Nintex Workflow 2010 configuration database in the Database settings page is modified, you may need to repeat these configuration steps to ensure permissions are set up correctly.
Workflow failure
If a workflow fails or a proposal fails to create because of a workflow failure, the SharePoint logs will have additional information to diagnose the error. By default, the SharePoint logs are found at "C:\Program Files\Common Files\Microsoft Shared\Web Server Extensions\14\LOGS". Workflow messages will be logged with a category of "Workflow Infrastructure".